Posts tagged "art"

Note:

At present, I write here infrequently. You can find my current, regular blogging over at The Deliberate Owl.

three white clay bowls sitting on a plank of wood

Clay bowls!

Because I was having so much fun in the fall making bowls, I signed up for more classes during the January Independent Activities Period (IAP) and the Spring semester. And I made more bowls.

(I should acknowledge that we were taught how to make a variety of different forms, including mugs, vases, and little jars with lids... but I have a fondness for bowls. They're the most useful.)

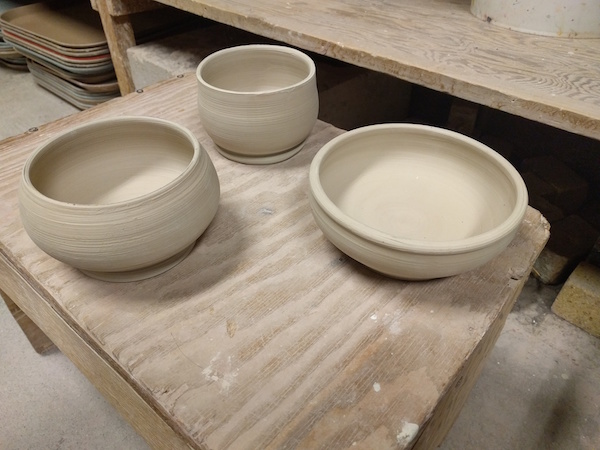
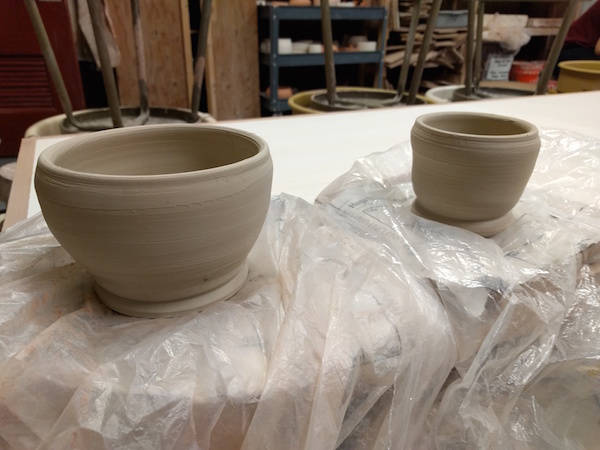
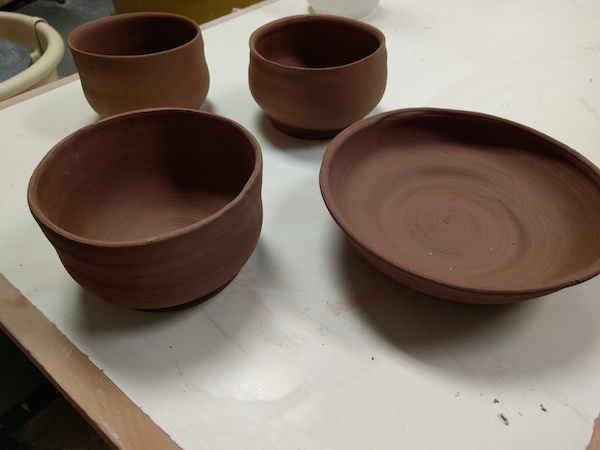
My goal during the first couple classes was to get better at centering my clay on the wheel. It's a critical step. If the clay isn't centered, you will get something very lopsided and uneven as a result. It can take a lot of practice to get the feel for it. Here are my bowls from January:

bowl half pale blue and half yellow-gold, with an hourglass-esque pattern where the colors overlap

side view of a blue and off-white glazed bowl, middle roundly bulging out

top down view of a bowl with a purple rim and purple spots on top of pale blue and a streak of pinkish red

two white clay bowls, taller than they are wide, unglazed

top down bowl with half matte yellow glaze and half shiny pale blue glaze

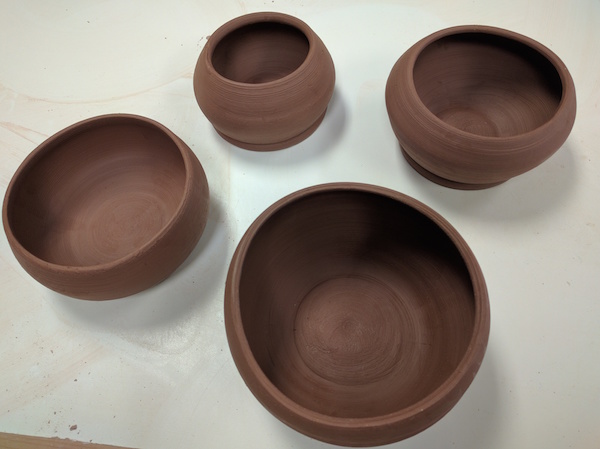
During one of the later classes in the spring, we did timed trials, an exercise aimed to help you get faster at this once you've gotten the basics down. We were given a set number of minutes or seconds to perform each step in making a form -- like centering the clay, making an opening, forming the walls, and so on. We were also required to make a certain shape, such as a form that was taller than it was wide, or with an opening smaller than the width of its base. These are the bowls I made during these trials:

four brown clay bowls, unglazed

bowl with an opening smaller at the top, brown and blue glazes with white spots

side view of a bowl, white and green and yellow

side view of a bowl that is narrow at the bottom, bulges out, and is somewhat narrower at the top, glazed in sea green, rusty brown, and blue

side view of a round, flat bowl, purple inside, white and yellow-gold matte outside

Another thing I was working on was making the walls of the forms a uniform thickness. Because you draw the clay up to make the form taller, it was pretty easy to end up with thicker clay near the base (where you didn't draw enough of it up) and thinner clay around the rim. This meant I had to do a lot of trimming later to fix the bases.

side view of the base of a bowl that has five small ridges circling the bottom before the bowl flares up and out

bottom of a white clay bowl, showing my initials

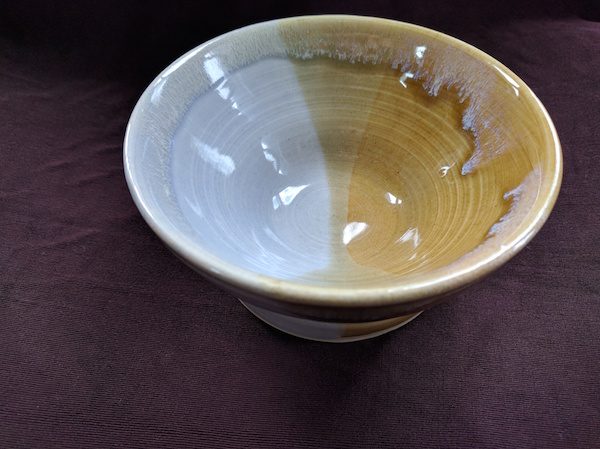
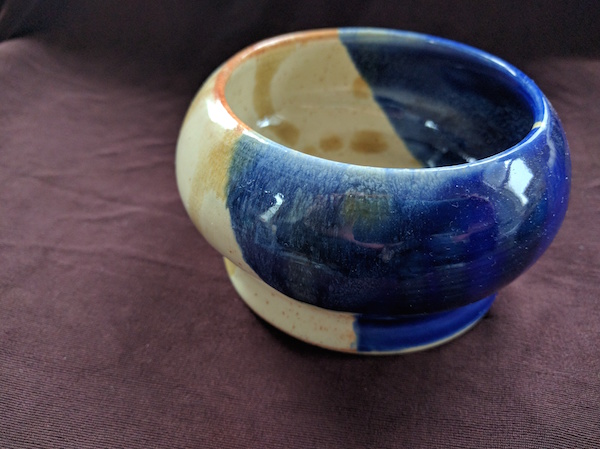
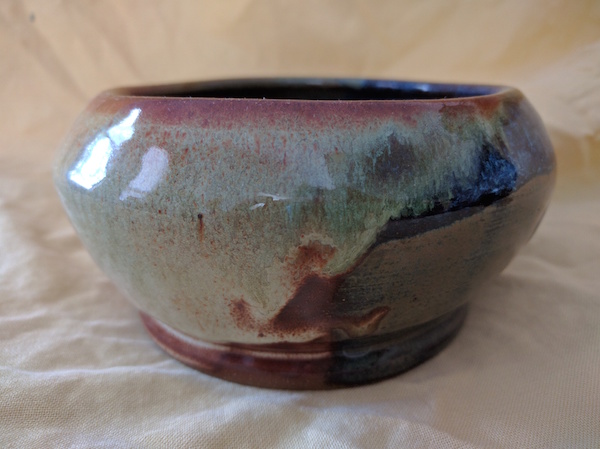
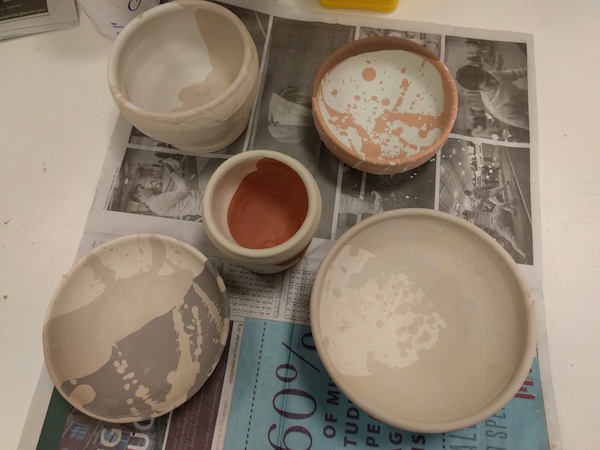
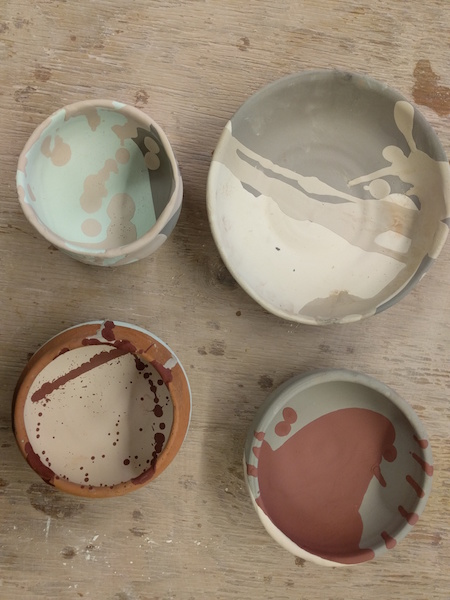
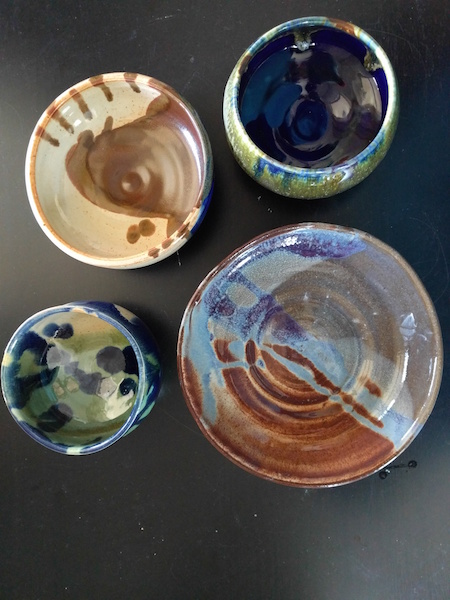
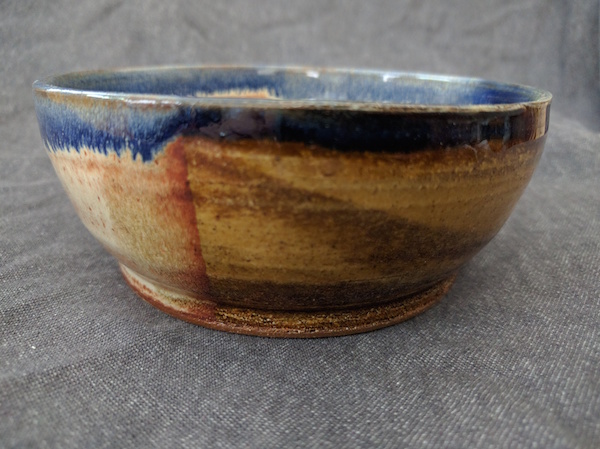
I also wanted to experiment with the various glazes available. What interesting combinations could I come up with? This was an interesting challenge, since before firing, glazes generally look nothing like their final forms... as you can see in these before and after images:

five glazed bowls before firing, in various dull shades of brown

five glazed bowls after firing, shiny and brightly colored

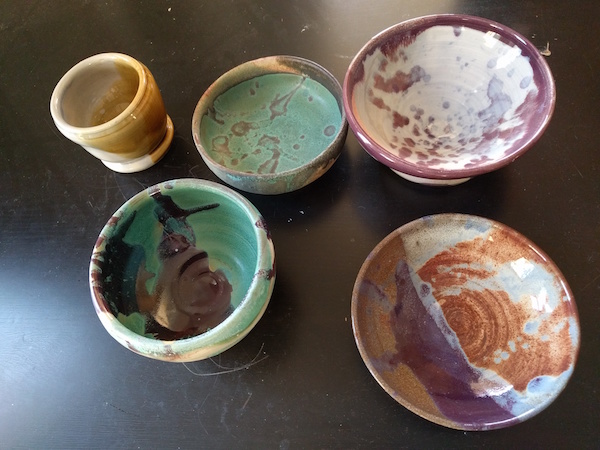
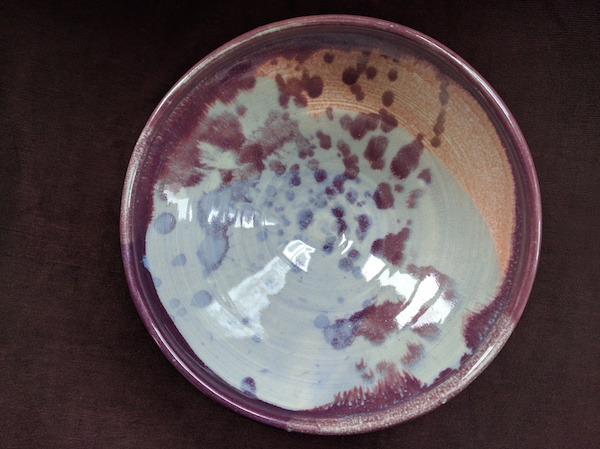
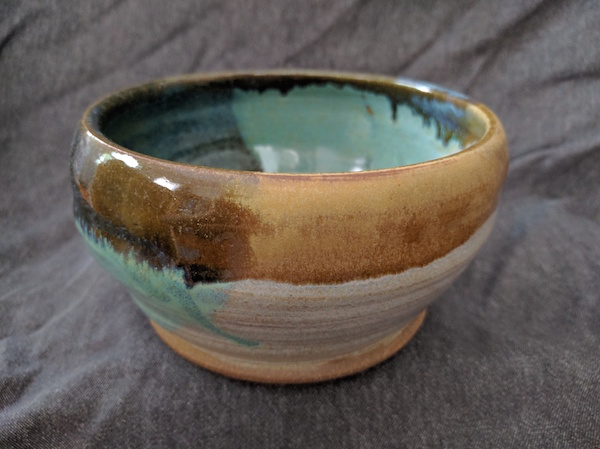
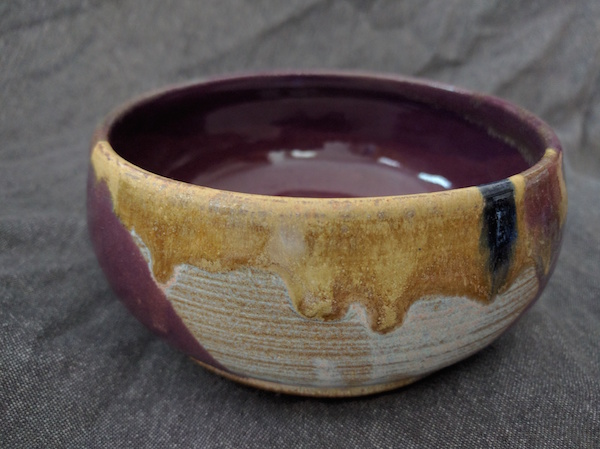
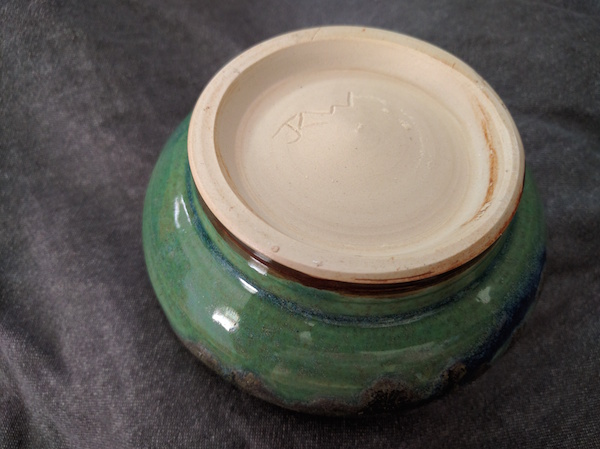
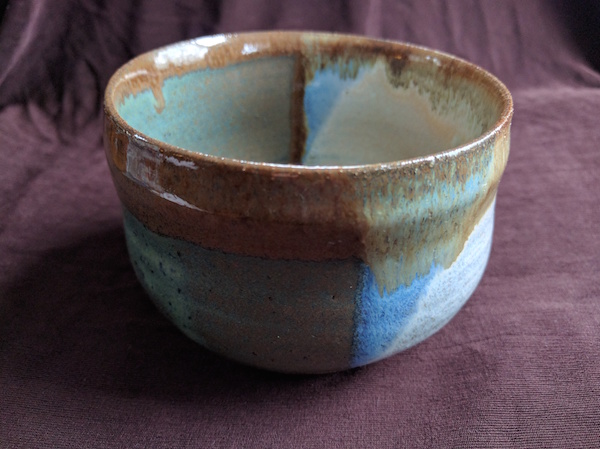
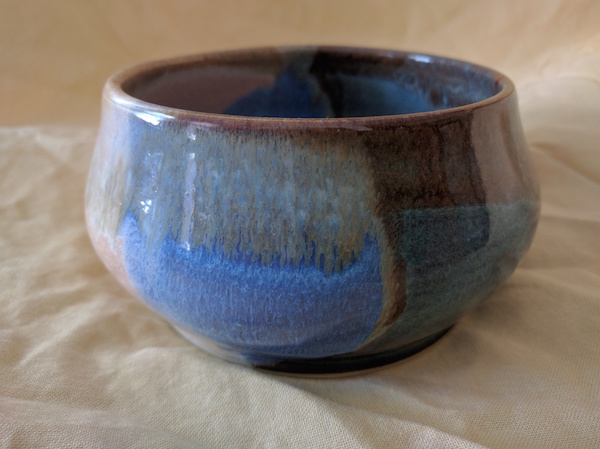
I really liked the glaze effects on the brown and purple one in the bottom right, so I tried to duplicate it in another bowl later:
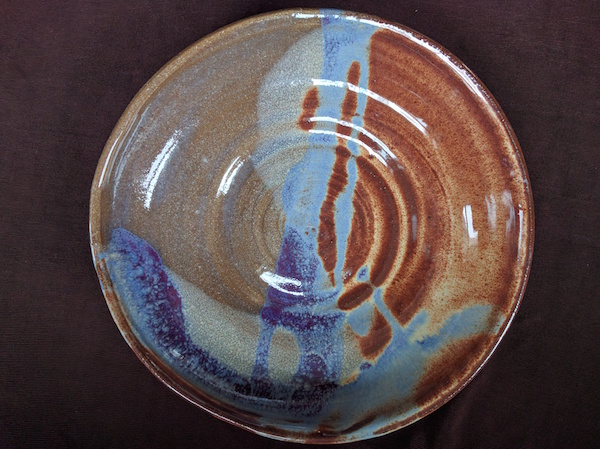
top down view of a bowl, brown and purple

Success!

Here's another sequence of bowls, from start to finish:

four brown clay bowls

four glazed, unfired bowls

four glazed, fired, colorful shiny bowls

Bonus bowls from later in the semester:

side view of a bowl with a rounded base and straight sides, glazed half sea green and half white, with brown along the rim

side-top view of a brown bowl with turquoise and blue polka dots inside

side view of a bowl with a round bulging base, fairly straight sides and a thin rim, glazed in browns and blues

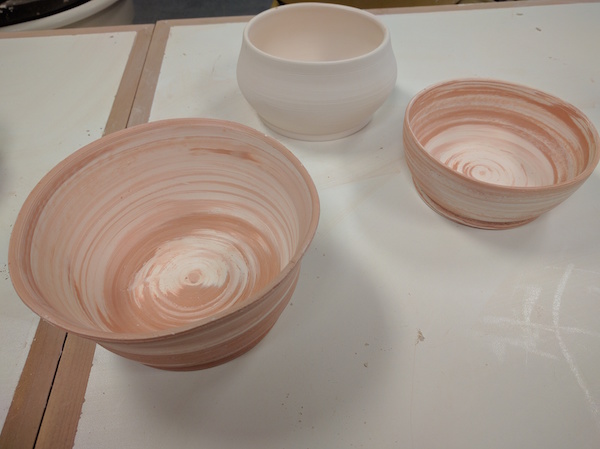
We also played with marbling two clay bodies together -- using both white and brown clay in the same form. Here are my two bowls with marbled clay after their bisque firing:

unglazed bowls with two clays so you can see the swirling of the white and brown clays together

Same bowl, two views so you can see how the glaze patterns are asymmetrical:

side view of a round marbled clay bowl, yellow-gold with a blue rim

marbled clay bowl seen from the side and top, blue on the rim dripping down to mix with the brown and white sides

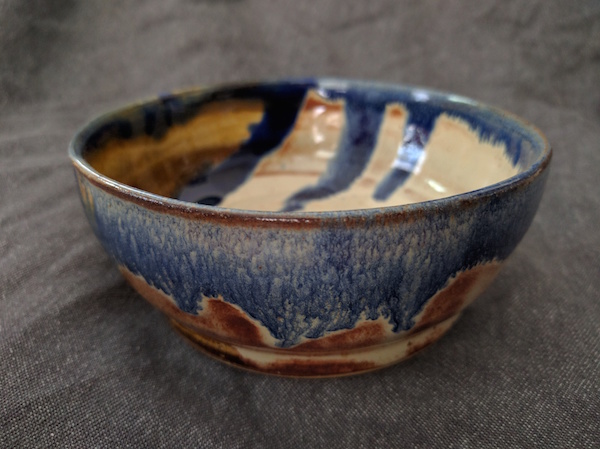
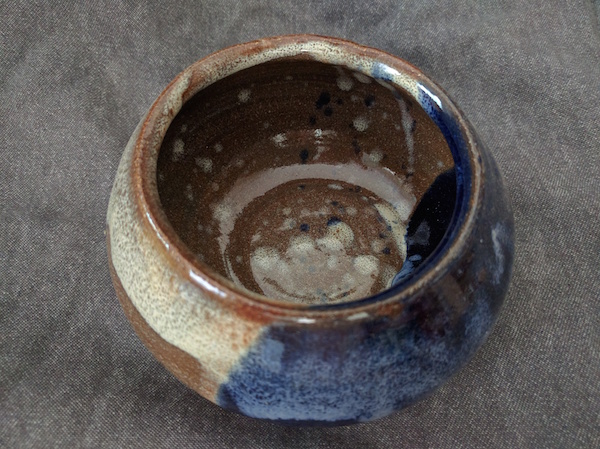
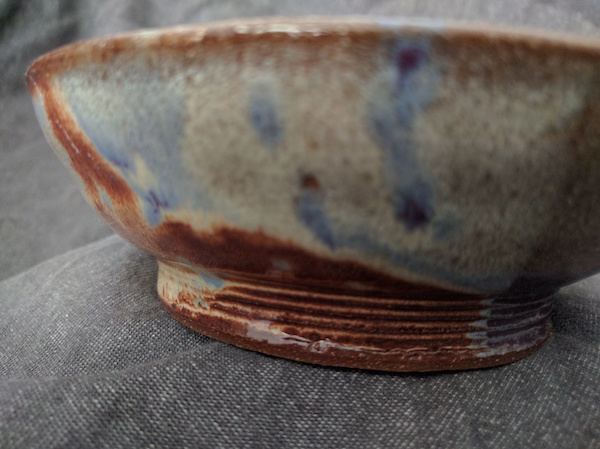
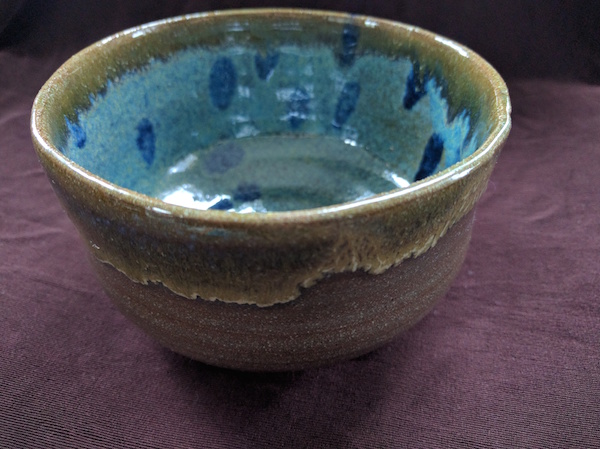
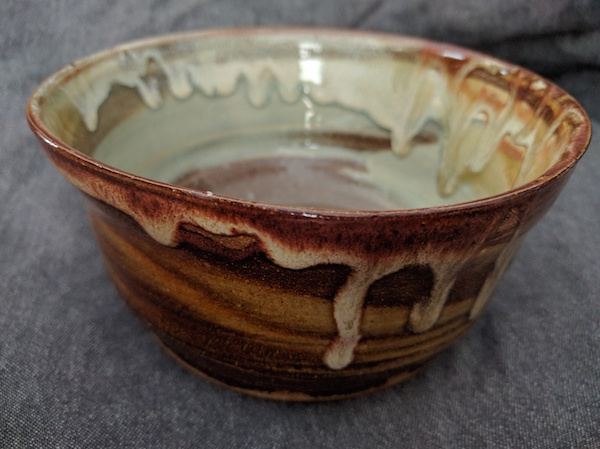
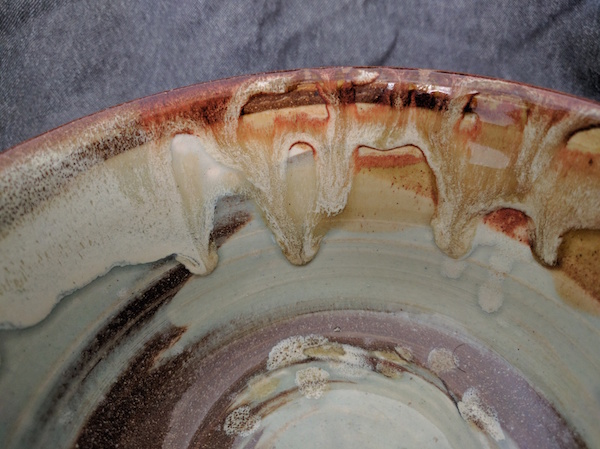
The other bowl, with a close up of the cool dripping glaze on the inside:

side view of a marbled clay bowl with gold and pale blue-green glazes, with a brown-white glaze dripping around the rim

close up of dripping glaze on the rim of a bowl


0 comments

img alt

Bowls, bowls, and ... bowls!

I took a ceramics class! Hunks of clay, a spinning pottery wheel, mud, the whole nine yards. It was really fun taking a proper art class again. I haven't done that in a while. Making things is a nice break from the writing and programming that's been my academic life of late, with the extra awesome bonus that the pretty things I made are also functional.

img alt

The first two were kind of lopsided. As you can see, it took a few tries to get the hang of making the clay form a bowl-shape. The turquoise glaze on this one, however, makes it look like it's make of old copper with a patina layer on the surface, like the Statue of Liberty. Pretty cool effect.

img alt

The next two bowls I threw looked nice at first, but they dried out between the initial throwing and when I came back to trim them later. So, I got to smash them with a hammer. The remnants got put into the "leftovers" bucket that eventually gets remixed into useable clay.

Later in the semester, we learned how to marble two clay bodies together - using both white and brown clay. Here's a photo of my two marbled bowls, drying out before their first firing:

img alt

After the first firing, you apply glaze, then fire again. Interesting thing about glaze: it's a bucket of thick sediment in water. It's nothing like paint and the colors are nothing like the final product. Sediment + high heat = different colors! Chemistry is fascinating like that.

The glaze on the rim of this marbled bowl turned out to have very interesting effects - see the light, cloudy, feathery features as it ran down the inside of the bowl?

img alt

Here are two other bowls waiting for their first firing, nice and round. Focusing on shape and form was a fun change to explore -- much of the other art I've done lately (like painting) has had an emphasis on color. I really like the shape of the bowl on the right:

img alt

Bottom of that righthand bowl, after glazing. I've been signing them all with my initials!

img alt


0 comments

two paper flowers sticking up out of a jar

Invitations

For my wedding, I designed my own invitations. Here's the art: line drawings of birch trees (one of Randy's favorite kinds of trees), a flowery vine wrapping around the edge, and a few butterflies (but look closely: one is actually a penguin!). I used black micron pens.

line drawing of birch trees and flower vines on a sketchpad

I took a photo of the page, opened it in GIMP, added all the invitation details with lovely text boxes in some fancy script, and printed them out on nice paper.

Thank you cards

The thank you cards I sent were similarly my own design—in this case, a line drawing of a magnolia flower, chosen because I had a nice reference photo of a magnolia flower on hand. These were printed on regular printer paper and folded up in fourths.

alt

Cake toppers

While we considered being nerds and putting a Han Solo / Leia combo on top of the cake, we ultimately picked classy penguins. I made these with sculpey clay.

two colorful clay penguins sitting on top of a wedding cake

Centerpieces

The centerpieces for our reception were arguably the most elaborate part of my wedding crafts, simply due to the sheer number of moving parts!

Here's a reference photo of the setup for one of the tables.

five colorful sheets of scrapbook paper arranged in a circle on the floor, with several jars in the middle containing a candle and paper flowers, with scrapbook materials scattered around

Each table got five sheets of scrapbook paper, arranged in approximately a circle. In the middle, there were three jars. One held paper flowers; one held a candle; one held a wire tree covered in little monster finger puppets. All around that, we scattered materials for decorating the scrapbook pages: some pens, markers, crayons, and stickers. Somewhere in there was the table's placard—in this picture, Unity. That was our table. The other tables had names like Bliss, Felicity, etc.

five colorful sheets of scrapbook paper arranged in a circle on the floor, with several jars in the middle containing a candle and paper flowers, with scrapbook materials scattered around

The paper flowers were my solution to not having a florist. They went well with the crafty theme and my ribbon bouquet! The vases were reappropriated food jars that had interesting shapes—molasses, maple syrup, raspberry syrup, and so forth. I filled each with paper confetti strips and put three flowers in each.

Here are all the flowers:

alt

The candles were fairly straightforward. I used modpodge to attach little pieces of semi-transparent paper onto reused peanut butter jars. I put a little 1x2in blue candle inside each one.

The last piece was the monsters. My older sister provided about a hundred felt finger puppet monsters she had made. I painted jars with turquoise, yellow, pink, and green glass paint. Then, I used green floral wire to make curly wire "trees" that sat inside. The monsters perched on top, one to a branch. I added a little sign saying "Adopt a monster!" so my guests would know they could take one home.

monster finger puppets sticking out of a jar on top of a little wire tree, on a table

felt monster with googly eyes peeking out of a shirt pocket

And two more photos from our reception:

colorful sheets of scrapbook paper arranged in a circle on a table, with several jars in the middle containing a candle and paper flowers, with scrapbook materials scattered around

monster finger puppets and paper flowers


0 comments

glowing whiffle ball{: .img-responsive .img-rounded .center-block}

Click here to see the video showing this project!

Concept: Glowing Orbs

Glorbs. Glowing orbs. Interactive balls that help you visualize and explore the dynamics of motion&mash;acceleration, velocity, rotation. Colored lights embedded in the balls give immediate visual feedback about how the balls are moving. Throw one up in the air, and watch the colors change from blue (high acceleration) to purple to red (little acceleration) and back to blue on impact as you catch it. Learn about physics!

The idea for glorbs evolved from a project I did in the Media Lab's Tangible Interfaces class the previous semester. My group came up with an idea for a wearable interface to motivate and guide collaborative, synchronous motion—i.e., pairs of wristbands containing LEDs that would change color and intensity as you move synchronously with other people wearing similar wristbands. We made a stop motion video showing off the concept, and a prototype wristband that lit up.

Why not make that class project come to life for The Other Festival? Randy, my husband, thought it'd be fun to do an electronics project, so away we went. Several brainstorming sessions later, the concept had evolved into something doable in the span of one semester—you know, not requiring a bunch of sensors and complex algorithms for measuring synchronous movement between humans...

series of images of person tossing a glowing ball in an arc, on the left it is blue, then it turns red, then back to blue, reflecting the ball's acceleration

Glorb Design

We prototyped on a breadboard. Wires, xbees, microcontrollers, LEDs... We used a triple-axis inertial measurement unit (IMU) to measure acceleration and rotation, which was streamed to an AVR microprocessor. There, it calculated average values and set the LED colors and brightness levels appropriately.

A wireless transmitter (xbee radios!) let us stream the data to a computer, so we could show a real-time graph.

breadboard with wires, xbee radios, LEDs, and other electronics parts

Once we had settled on a design, Randy laid out a PCB. We ordered parts. We used the Media Lab's shop to machine the boards. We soldered.

We cut plastic whiffle balls in half, stuffed them with the electronics, a battery pack, and some bubble wrap, and tied them up with thin nylon rope. Bam! Glorb.

two halves of a whiffle ball

whiffle ball tied closed with rope

Besides the glorb that changed colors from red to purple to blue to reflect its acceleration, we also made a glorb that got brighter under high rotation, and dimmer under low rotation.

randy holding glorbs

The Other Festival

We set four glorbs on a table in a dark room. We wanted to see what people did with them— play? explore physics?—so we did not provide any instructions or guidance, just four glowy balls.

People came in. While we didn't hear anyone explicitly discussing physics, people did pick up the balls, tossed and caught them, played around, and generally found them entertaining. Which was the goal!

jackie holding glorbs

Video

I made a video showing the development of the glorbs, featuring yours truly juggling three of them. Watch it here!

Acknowledgments

Thanks to Jonathan Speiser, Adina Roth, and the 2013 MAS.826 class for their support on earlier versions of this project!


0 comments

paper robots hung on windows saying 'am I alive?'

Alive and not alive

At the core of this project is the idea that new technologies are not alive in the same way as people, plants, and animals -- but nor are they inanimate like tables, rocks, and toasters. We attribute perception, intelligence, emotion, volition, even moral standing to social robots, computers, tutoring agents, tangible media, any media that takes -- or seems to take -- a life of its own.

Sometimes, we relate to technology not as a thing or an inanimate object, but as an other, a quasi-human. We talk to our technology rather than about the technology, moving from the impersonal third-person to the personal second-person, moving into social relation with the technology.

So, given that we perceive and interact with these technologies as if they are alive... are they? At what point do they become alive?

What does it mean for a technology to be alive?

How much does whether they are “actually” alive matter, and how much is our categorization of them dependent on how they appear to us?

Maybe they will not fit into our existing ontological categories at all.

Not things.

Not living.

Something in between.

paper robot on a window saying 'I'm not a person but I'm not a rock'

Story

sketch of robot holding a flower

I explored the question of how to encounter the "aliveness" of new technologies through a set of life-size sequential art pieces.

The story followed several robots in the human world. Life-size frames filled entire windows. The robots ask about their own aliveness, self-aware and struggling with their own identity. They try to fit in, but don't. A wheeled robot looks sadly up at a staircase. A shorter wheeled robot sits in an elevator, unable to reach the elevator buttons. A stained-glass robot draws our attention to the personal connections we have with our technology.

Social robots. Virtual humans. Tutoring agents.

They are here. They are probably not taking over the world. They are game-changers and they make us think.

Perhaps they cannot replace people or make people obsolete. Perhaps they are fundamentally different. Perhaps they will be a positive force in our world, if done right. If viewed right. If understood as what they are. As something in between.

How will we deal with them? How will we interact? How will we understand them?

two blue paper robots on the floor

Medium

The story was created as a life-story story that the reader could walk through, so reading would felt more like walking down the hall having a conversation with the character than like reading.

I read Scott McCloud's great book, Understanding Comics, around the same time as doing this project. (Perhaps you can see the influence. Perhaps.) Comic-style, sequential art to promote a dialogue. An abstract character, because if you had an actual robot tell the story, something would be lost. Outlining the robot character in less detail, as more abstract, drew more attention to the ideas being conveyed, and let viewers project more of themselves onto the art.

colorful stained glass style robot in a window

The low-tech nature was partially inspired by ancient Chinese cut paper methods, as well as by some comics styles. The interaction between the flat, non-technological medium through which the story is told and the content of the story -- questions about technology -- calls attention to the contrast between living and thing. What is the role of technology in our lives?

Installation

Select frames from Am I Alive? were installed at the MIT Media Lab during The Other Festival.

Video

I made a short video showing the concept, making of the pieces for the installation, and photos of the installation. Watch it here!

Relevant research

If you're curious about the topic of how robots are perceived, here are a couple research papers you might find interesting:

  • Coeckelbergh, M. (2011). Talking to robots: On the linguistic construction of personal human-robot relations. Human-robot personal relationships (pp. 126-129) Springer.

  • Kahn Jr, P. H., Kanda, T., Ishiguro, H., Freier, N. G., Severson, R. L., Gill, B. T., Ruckert, J. H., Shen, S. (2012). “Robovie, you'll have to go into the closet now”: Children's social and moral relationships with a humanoid robot. Developmental Psychology, 48(2), 303.

  • Severson, R. L., & Carlson, S. M. (2010). Behaving as or behaving as if? Children’s conceptions of personified robots and the emergence of a new ontological category. Neural Networks, 23(8), 1099- 1103.


0 comments