


Background
During my college semester studying abroad in Sydney, Australia in 2009, I took a sculpture class. I've already documented the sculpture I created during the second half of the class, which focused on space.
This project is from the first half of the class, where we considered mass. We worked in clay and plaster.
Mass:
- A coherent, typically large body of matter with no definite shape
- A collection of incoherent particles, parts, or objects regarded as forming one body
Concept
The assignment was to sculpt a head -- our professor's head, who sat as the model -- out of clay, and then cast it in plaster.
I decided I wanted to sculpt a realistic head, rather than an overtly abstract one. The biggest reason for this was that I had never sculpted anything big out of clay before. Although it certainly takes skill to create chaos in a visually pleasing way, it is perhaps more difficult to create order in one-to-one correspondence with the actual world. I like a challenge.
We started by talking about the proportions of the human head, looking at example sculptures of human heads that varied from realistic to highly abstract. The next task was to practice: we took lumps of brown clay and mushed them into representations of various facial features. Eyes, noses, mouths. As it turned out, this practice was remarkably helpful when trying to form the much larger block of clay into a realistic head shape.

Construction of the clay model
I added lumps of clay to a wooden base set with a wooden center post piece by piece, using my hands to mold the clay into a general head-like shape. A variety of tools for working with clay were provided. I preferred to use my hands. I felt I had better control over the resultant shapes that way.
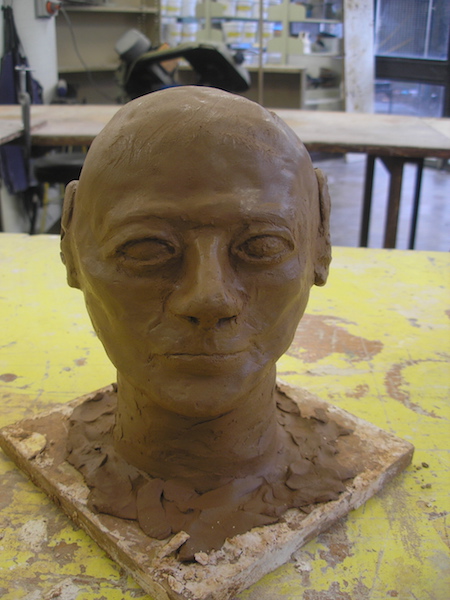
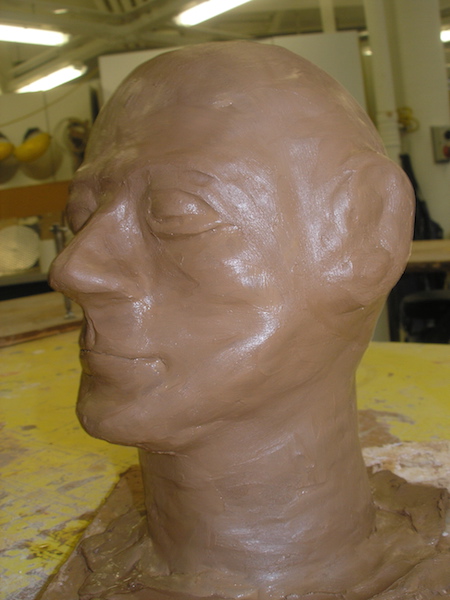
After finishing the initial form, I smoothed out his features a bit:
Casting in plaster
The next stage was to make a plaster waste-mold using the clay head as a base.
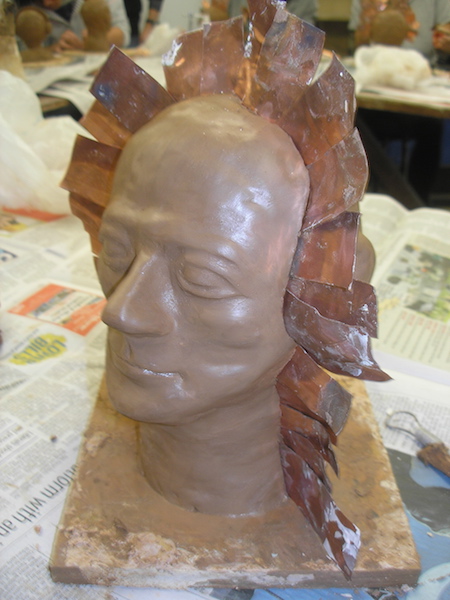
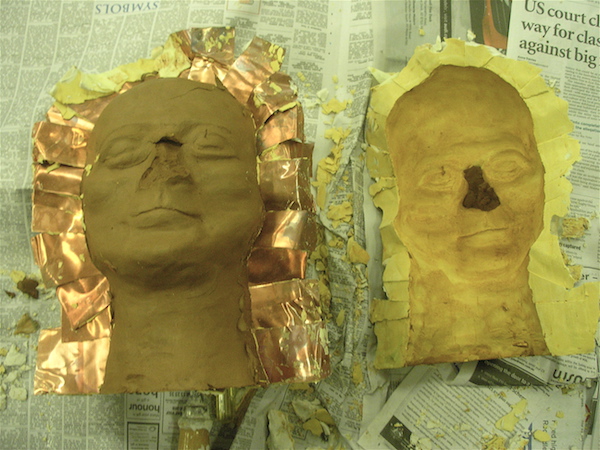
After touching up the clay head, I sketched a seam line through across the top of the head and down in front of its ears to mark out where the metal shim fence would go. This would keep the two halves of the plaster mold apart.
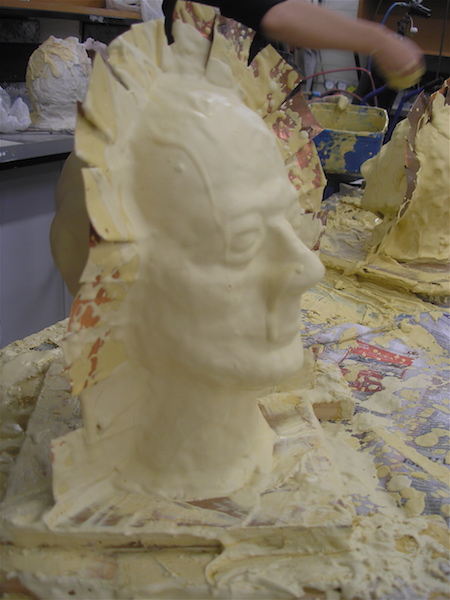
Then it was time to throw plaster. Literally. First, I applied two aptly-named splash coats. The point of throwing handfuls of plaster at the clay model was to remove air bubbles. These layers were followed by a clay rubbing--which makes it easier to remove the plaster layers later--and three layers of thicker plaster, about the consistency of thick whipped cream.
The next class, we separated our molds. A chisel and mallet did the trick. The front half came off clean, except for the nose. I scraped the clay out of the back half and cleaned them both up. This was followed by painting on two coats of shellac to seal the mold.
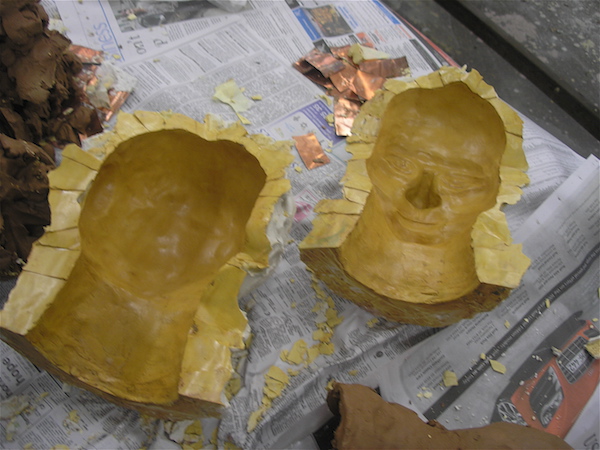
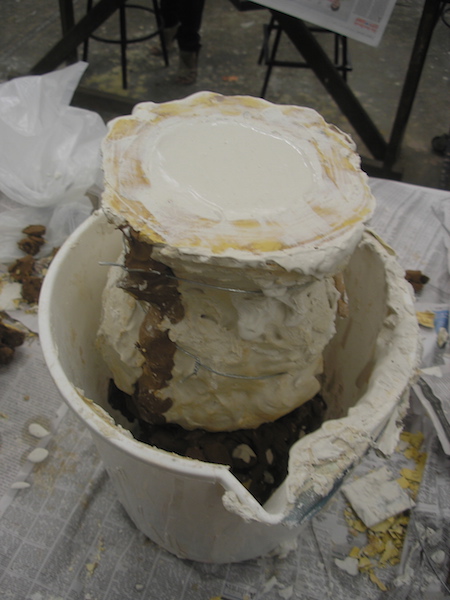
Then it was time to fill the mold! After spraying on a thin coat of WD-40 to prevent the poured plaster from sticking, I tied the two halves together with wire. Any gaps along the seam line were plugged with clay. Then I propped up the mold open-side up in a bucket, and poured in the plaster.
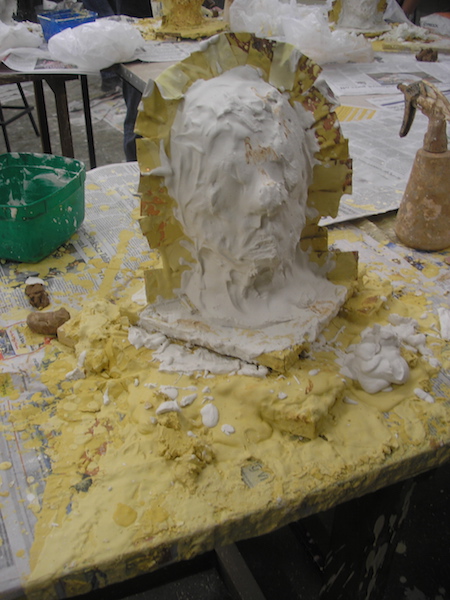
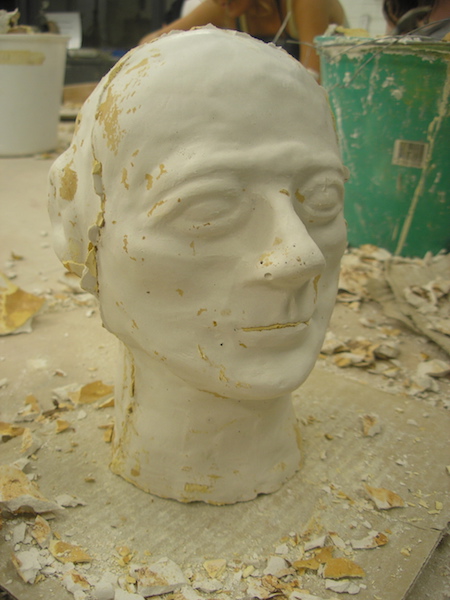
The following week, it was time to remove the mold from the casting. A chisel and mallet came in handy once again.
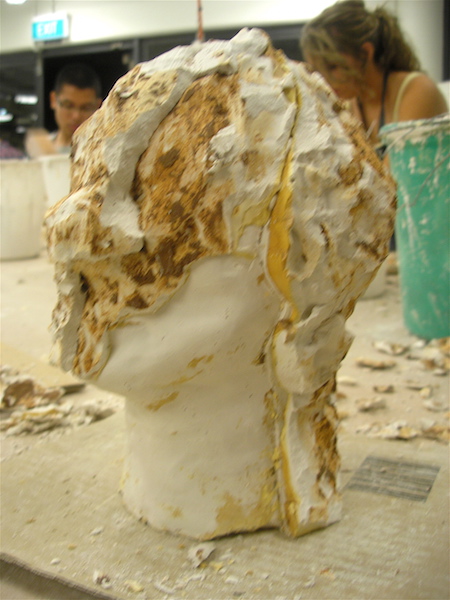
I chipped away at the plaster mold to reveal the casting. Some cleanup with sandpaper, a scrub brush, and a metal scraper was required.
In the end...
"The world is an okay place."
I had tried not to distort the face's features during my initial clay work. I returned later to adjust the clay to work better for the plaster mold, smoothing out some features, slightly exaggerating or emphasizing others. The result is a calm face, a peaceful face. He looks content, does he not?
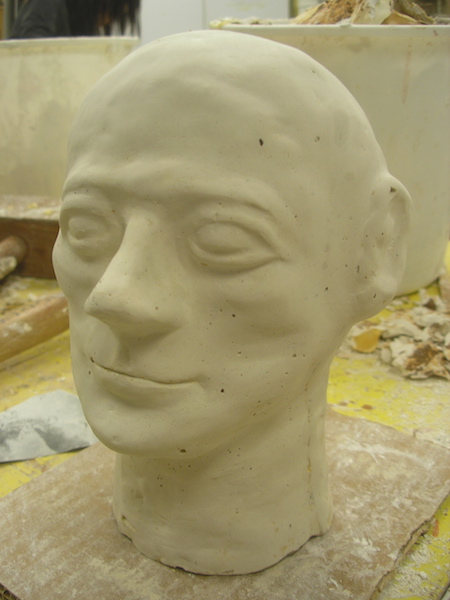
Despite the little holes here and there, the pockmark at the corner of his mouth, the pimple of plaster--he is content. He knows that no person is perfect. The blemishes, the marks, the indents and pocks on our faces are evidence that we have lived in and interacted with the world around us, instead of hiding in a sterile box where the world is not.
I tried, with this sculpture, to convey a sense of acceptance of things as they are, of life as it is. So I did not fill in the holes or file away all the pimples; I didn't cover the plaster by some other color or finish. It reflects the way life is: a little imperfect, a little unfinished. But despite, okay. Good enough for us.
Thus the title:
The world is an okay place.